Opening hours
- Mon–Fri 09:00–18:00
- Sat, Sun Closed
Contact information
- Service phone: +371 26 27 0033
- Store phone: +371 20 36 6075
- Email: info@bless.lv
Company details
- Registered address: Rīga, Jukuma Vācieša iela 12–22, LV-1021
- Registration No.: 50203021691
- VAT No.: LV55ZZZ50203021691
Bank details
- AS Swedbank
- IBAN: LV18HABA0551050584902
Polishing the headlights of the Volkswagen Golf 5 (2007) 1.9 TDI: improved safety and aesthetics
If you own a Volkswagen Golf 5 (2007) 1.9 TDI, you know how important regular maintenance is to keep your vehicle running smoothly. One of the most important aspects that is often overlooked is the condition of your headlights. Over time, the headlight glass can become cloudy and dull due to exposure to environmental elements, which affects both visibility and the overall appearance of your vehicle. Fear not, our car service team at [Car Service Website Name] is ready to assist you with your headlight polishing process for enhanced safety and aesthetics. In this detailed article, we share valuable tips on how to improve your night driving experience.

Why is headlight polishing important?
Keeping your headlights clean and bright is critical to your safety and the safety of other road users. Dim or foggy headlights can significantly reduce visibility while driving at night, increasing the risk of accidents. In addition, foggy headlights can cause your vehicle to fail inspection, resulting in costly repairs and inconvenience. With a little time polishing your headlights, you can restore your Volkswagen Golf 5's headlights to their original brightness, making night driving safer and more enjoyable.
Step-by-step guide to polishing headlight lenses:
Step 1. Collect the necessary materials
Before you dive into the process of polishing the headlights, gather the necessary materials:
- Headlight restoration kit
- Microfiber towels
- Masking tape
- Spray bottle with water
- Variable speed electric drill

Step 2 Clean the headlights
Start by thoroughly cleaning your headlights with mild soap and water. Remove any dirt, debris or residue to ensure a smooth polished surface. Dry the headlights completely with a microfiber towel.
Step 3. Masking for protection
To protect the car's paint and surrounding areas, apply masking tape around the headlights, leaving only the lenses exposed.
Step 4Apply Headlight Restoration
Follow the instructions provided with the headlight restoration kit to apply the restoration compound. Use an electric drill with a polishing pad or sanding pad in gentle circular motions for best results.
Step 5. Wet sanding (if necessary)
For more persistent cloudy areas, consider wet sanding with sandpaper from the restoration kit. Follow the manufacturer's instructions and sand the surface evenly to get a smooth finish.

Step 6. Polish
Once the restoration compound has been applied and the headlights are smooth, use a clean polishing sponge or microfiber cloth to polish the lenses. This step removes all residue and improves the brightness of the headlights.
Step 7 Apply UV Sealant
Protect your freshly polished headlights with the UV sealer included in the restoration kit. This sealant provides long-lasting shine and protects against UV rays and environmental factors.

Our commitment to comprehensive car repair methods allowed us to avoid unnecessary expenses. Every vehicle we work on benefits from this principle, ensuring cost-effective solutions..
Don't hesitate to get in touch with us for all your auto repair needs. We're here to assist you every step of the way!
If your vehicle has been involved in an accident or needs repairs or maintenance, trust our experienced team to get the job done right. We are committed to providing excellent service and restoring your vehicle to its pristine condition.
Contact us today for all your automotive needs and experience the expertise and dedication that sets us apart. Drive with confidence knowing that your car is in safe hands.
You can also contact us:
- By phone: +371 26270033
- By mail: info@bless.lv
- Instagram: bless.auto
- Facebook: Bless.Auto.TS
- Pinterest: blesscarservice
Related posts
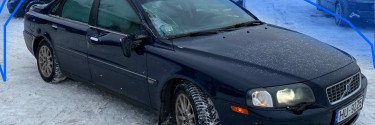
Recovering a 2004 Volvo S80 I Diesel after an accident
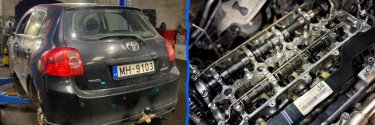
Solving problems with starting in the cold season on Toyota Auris 2.0d D-4D 2006

Volvo V50 1.6d 2009: High consumption and loss of power

Recovery BMW 3 Series 2.0d 2006 after the accident
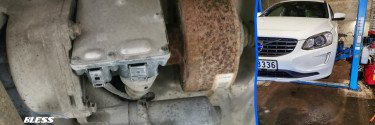
Volvo XC60 2.4d, (2017) annual scheduled car maintenance
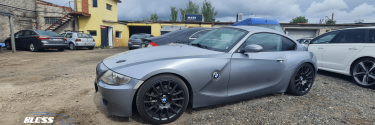
BMW Z4 E86 3.0si (2007) got into an accident and damaged the bumper

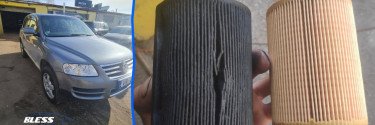
Volkswagen Touareg 3.0 TDI (2006) increased oil and antifreeze consumption

SsangYong Rexton 2.7D (2007) automatic transmission problem
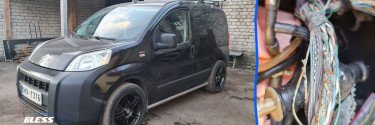
Citroën Nemo 1.4HDI (2008) picks up speed slowly
0 comment(s)